Tuesday, March 23, 2010

How to Install Blackberry App World In Any Country

RIM has just announced that Blackberry App World is now supported Malaysia, but it took a VEEEERY long time before that happened. So if you are anything like me (ie impatient) and living in an unsupported country, here are a couple of workarounds would be very useful to install App World:

WORKAROUND 1 - Installs App World 1.1.0.11
PRO: Newer version of App World
CON: A bit more work to install; limited apps available for download
  1. Download the following .Zip File : appworld_1.1.zip
  2. Open the file with your favourite zip program and navigate to the appworld_1.1 folder
  3. Copy the files net_rim_bb_appworld.cod, net_rim_bb_appworld_resource_en.cod and JavaLoader.exe to the following folder depending on your Windows OS:

    In Windows Vista “C:\Users\(Your User)
    In Windows XP “C:\Documents and Settings\(Your User)

  4. Start CMD (Windows Key + R and then type CMD)
  5. Plug-in your BlackBerry
  6. Type: javaloader -u load net_rim_bb_appworld_resource_en.cod
  7. Type: javaloader -u load net_rim_bb_appworld.cod
  8. Reboot your Blackberry to be on the safe side.
  9. This would have installed Blackberry App World 1.1.0.11 on your Blackberry. It's not the latest but should be enough to tide you over until your country is supported by RIM.
I've tested this on my Bold 9000 and it works. Please comment if you have tried it on any other models.

WORKAROUND 2 - Installs 1.0.0.30
PRO: More apps available for download
CON: Some apps a bit unstable; Can't upgrade to latest version of App World
  1. This workaround is much easier than option 1, especially if you are wondering what all this CMD this is about.
  2. Launch the Browser on your Blackberry
  3. Navigate to the following site (type it in full): http://mobileapps.blackberry.com/awclient/download.shtml?code=appworld&CPID=REFERFRIEND
  4. This will install Blackberry App World 1.0.0.30. It's outdated but still works. Unfortunately, you won't be able to upgrade to the latest version using this workaround eventhough it prompts you when you launch the app.

Please visit this forum post for the lastest on this topic, including installing App World on the Bold 9700 (Bold2): Appworld on ANY Country!!

Also, thanks to Blogjer for mirroring the appworld_1.1 file above.

Saturday, October 17, 2009

New Bejeweled Blitz for Facebook - Updated Tips!

Popcap recently updated the online version of it's popular Bejeweled Blitz game on Facebook. I had previously written a tips and tricks guide for the previous version of Bejeweled Blitz for Facebook and all the strategies are still valid with the updated version. However, with the new version, there also comes a couple of new tactics to help you increase your score.

If you haven't checked out my previous guide yet, please do so and also apply them with the tips below:

1. Blitzing Through

If there is one thing I can say about the new Bejeweled Blitz for Facebook is that it sure lives up to it's name - It's FAST!

You'll notice with the new Blitz is that the speed of the falling gems increase as you rack up the speed bonus. This makes it easier to get speed bonuses but the speed bonus bar also runs down pretty quick, so maximize it while you can. Oh, and the speed bump also makes for good chain bonuses!

2. Last Hurrah!

This isn't really so much of a new tip, but more of a new feature in the new Blitz. When time runs out, you are now given a bonus for each special gem (power gem, lightning, hypercubes, multipliers) that are still on the board. This really allows you to bump up your score before it's game over.

As time wears down, don't bother with that annoying lightning and power cube you can't seem to match. Instead focus on the multipliers and hypercubes (in that order) as the bonus you get in the last hurrah isn't as much as getting multiples for matchs or controlling which gem type to match for the hypercubes (assuming you have a hypercube with a plentiful gem type next to it of course).

And that's it! These two new tips alone is enough to increase most people's Bejeweled Blitz score!

In a way, Popcap have made it easier to attain higher scores. Which I think is why they have decided to retire the 25K badge (even though they credit it to our skill at breaking that bank) and introduced higher score badges. I even have a friend on my ladder who has gotten a ridiculous score of 339K! There isn't even a badge for that!

On a personal note, I have finally managed go break my 200K barrier, though that score doesn't even get me on the top 5 of my ladder anymore! Looks like I've still got some work to do...

Good luck!

Monday, September 28, 2009

Review: Ping! - iPhone Push Messaging is here!

One of the things that I dislike about the iPhone is that it still doesn't have multitasking capabilities. And I don't mean just playing music while I write an SMS, but true multitasking capabilities, which would allow me to push my Yahoo Messenger app into the background, so I can quickly call up the Messages app to send an SMS.

No can do! You'd have to quit YM just to send that quick SMS and then sign back in again. Any messages that are sent during the time offline is received as offline messages which are received once you sign in. What a bother, but I guess another key reason for not having true multitasking available is because of the crap battery life of the iPhone (my other iPhone pet peeve) and that IM networks, like YM and MSN are not specific for the iPhone so it can't take advantage of the Push notification made available by the iPhone OS 3.0.

That's where a new iPhone-to-iPhone IM tool called Ping! comes in and gets it right.


What makes this app different from the other iPhone messaging apps is that it is specific for the iPhone and uses Push notification to inform the recipient when a message is received, even if Ping! is not running.

The Ping! Splash Screen

Friends Screen showing each conversation that is ongoing

The main conversation window.
You are able to link your Ping! contact with an entry in your Address book using the "Link to Address Book" button.

How the Push notification looks like.
Even has the message displayed! Very cool!

So now, with Ping!, users can now send message to their other iPhone-wielding friends without using SMS. This is obviously great savings if both users are on data service packages with ample data quota and also as an alternative to sending international SMSes, which tend to cost much more than their local cousins.

This is similar to the service that Blackberry Messenger makes available for all Blackberry users. But I guess the biggest difference is that while I would trust a company like RIM with the privacy of my conversations and email, I am not so sure about this Gary Fung chap who developed Ping! So while I would still use this app to have simple conversations with friends, I'd avoid discussing national secrets with this app.

Ping! still lacks a lot of key features that you'd expect out of an IM application, like proper friends list management and blocking, but it's still a great first step. I still think that some of the privacy concerns need to be addressed first before this can hit critical mass though.

Ping! is FREE for now so get it while you can!

UPDATE 1: Ping! is no longer free... But you can get the full version for just $0.99 or Ping! Lite for FREE. Take note though that Ping! Lite is ad sponsored.


UPDATE 2: There have also been many reports from people I know using Ping! that messages somethings comes in delayed (sometimes up to a day) or never gets delivered at all. The developer has responded that the messages have been sent to the Apple push servers for delivery, and might have gotten lost or says that the network that I and my friends are using is slow. This has happened a bit too often to be an isolated occurrence so I am guessing that it might be a load scaling problem due to the increased volume of users on the application now. In any case, reliability is still suspect so if you really need to get the message across to your intended recipient, stick to SMS. If you just want to have a casual chat, you can try using Ping!, just don't blame your friends if they don't reply immediately...


RECOMMENDED (until something better comes along... Which I will review when it does!)

iPhone Tip: Free Emoticons/Smileys/Emoji without Jailbreaking

New iPhone users are always impressed when they get SMS's with emoticons/smileys in them for the first time. Want proof? Here's an actual SMS thread that I had:


These smileys are actually part of the Emoji character set that is part of the Japanese keyboard settings on Japanese iPhones. However, this keyboard setting is actually available on all iPhones! It has just been hidden.

There are some apps out there on the App Store that allows you to unlock the Japanese character set for USD0.99 and there is also an app available in Cydia if you have a jailbroken iPhone.

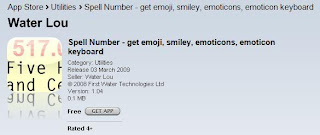
However, if you don't wish to pay for cutesy smileys and are too weak of heart to jailbreak your iPhone, then the Spell Number app is for you!


This nifty little app is actually meant to help people spell out a number (for stuff like writing cheques I guess), but hidden inside is the feature to unlock the Japanese character set, which includes the Emoji keyboard!

Here's how to do it:
  1. First install the Spell Number application from App Store
  2. Run the application on your iPhone
  3. Type in the following magic number: 91929394.59


  4. Exit the Spell Number app
  5. Access your Settings page
  6. Scroll down and select General


  7. Scroll down and select Keyboard


  8. Select International Keyboards


  9. Scroll down until you see the Japanese setting. Select it.


  10. Switch on the Emoji setting. You can also turn on Kana if you want access to the Hiragana/Katakana/Kanji character sets.


  11. And that's it! Emoji is now available. All you need to do to access it is to hit the Globe icon to access the smileys!


  12. You can also safely delete the Spell Number application if you don't intend on actually using it for spelling numbers... The settings have been saved to you phone.

Thursday, September 24, 2009

iPhone Tips: Enabling Push Email with Gmail

Yes! Push email from Gmail is now possible using the iPhone!

And it's super simple to set up too. Heck, you can even do a 3-in-1 OTA sync for your iPhone with Gmail, Gmail Contacts and Google Calendar following the instructions below.

Do note though that this will take up data bandwidth in the background, so if you are using pay-as-you-go data services, you probably want to reconsider activating push email.

  1. Ensure that you are on iPhone OS 3.0 or higher. You can check this by going to Settings -> General -> Version. If you are not on OS 3.0, fire up iTunes and download the latest OS from Apple.
  2. From the home screen, select Settings.
  3. Scroll down and select Mail, Contacts, Calendars.
  4. Select Add Account... .
  5. Select Microsoft Exchange (don't ask me why...).
  6. In the Email field, enter your full Gmail email address (ie. username@gmail.com, not just username).
  7. In the Username field, enter your full Gmail email address again.
  8. In the Password field, enter your Gmail password.
  9. Tap the Next button at the top of the screen.
  10. A new Server field will appear. Enter m.google.com in that field.
  11. Tap the Next button at the top of the screen again.
  12. Ensure that the Mail service is set to On.
  13. You can change the number of Mail Days to Sync to your preference.
  14. You can also select more Mail Folders to Sync other than the Inbox. This is useful if you have set auto-archiving filters on your incoming email on Gmail.
  15. Tap the Done button at the top of the screen.
  16. Tap on the Fetch New Data option and ensure that Push is set to On.
Now, new emails to Gmail should be pushed to your iPhone shortly after it arrives. Excellent!

iPhone Tips: Over-the-air Syncing with Outlook and Google Calendar

I use Outlook a lot to organize my meetings and appointments during the work week. Unfortunately, I am not always at my desk and am too busy to always remember to sync my iPhone or Blackberry to my Outlook using iTunes or the BB Desktop Manager.

That's when I came up with a 3-way syncing system between my Outlook, Google Calendar and my mobile devices, leveraging off Google Sync.

Basically, I use MS Outlook as my main scheduling tool. I use it to create and manage most of my appointments, including meeting requests that I get through email.

I then use Google Sync to synchronize the Outlook events to my default calendar in Google Calendar.

I then configure my iPhone and Blackberry to synchronize its calendars with Google Calendar. Viola! The iPhone and Blackberry calendars are now synchronized over-the-air and I don't need to worry about missing appointments now, especially on weekends when I don't have Outlook in front of me to alert me.

Here are the steps that you need to follow to set up Google Sync and your iPhone. I'll post the Blackberry sync instructions later as it's slightly different.

* Please do note that OTA syncing uses data services and will use data bandwidth in the background. So if you are on a pay-as-you-go data plan, you might want to reconsider using OTA syncing and just rely on the USB way to sync your calendar using iTunes.

SETTING UP GOOGLE SYNC
  1. Download the latest version of Google Calendar Sync for PC from http://www.google.com/sync/pc.html
  2. Install Google Calendar Sync
  3. In the Email field, enter your full Gmail email address (ie. username@gmail.com, not just username).
  4. In the Password field, enter your Gmail password.
  5. Under Sync Options, select 2-way to allow Google Sync to update both Google Calendar and Microsoft Outlook.
  6. In the Sync every field, select a practical sync interval. I set mine to 60 minutes.
  7. Click on the Save button.
  8. Right-click on the Google Calendar Sync icon on your system tray, and select Sync to populate your Google Calendar with the events from your Outlook.
  9. The Google Calendar Sync icon's animation will stop once it has completed syncing.
  10. If you get an error while syncing, it might be because there are conflicting events in your MS Outlook. You can try to resolve these conflicts using Outlook and try resyncing. If you still get the same error, you might need to do what I did - delete all really old events until the error is resolved.

SETTING UP THE IPHONE

  1. Ensure that you are on iPhone OS 3.0 or higher. You can check this by going to Settings -> General -> Version. If you are not on OS 3.0, fire up iTunes and download the latest OS from Apple.
  2. From the home screen, select Settings.
  3. Scroll down and select Mail, Contacts, Calendars.
  4. Select Add Account... .
  5. Select Microsoft Exchange (don't ask me why...).
  6. In the Email field, enter your full Gmail email address (ie. username@gmail.com, not just username).
  7. In the Username field, enter your full Gmail email address again.
  8. In the Password field, enter your Gmail password.
  9. Tap the Next button at the top of the screen.
  10. A new Server field will appear. Enter m.google.com in that field.
  11. Tap the Next button at the top of the screen again.
  12. Ensure that the Calendars service is set to On.
  13. Tap the Done button at the top of the screen.

Wednesday, September 23, 2009

iPhone Tips: Over-the-air Syncing of Contacts, Calendar & Email with Gmail

One of the problems that I had when migrating to the iPhone was how to move across all my contacts from my old Sony Ericsson W880i. I didn't want to let iTunes sync with my Outlook as that is reserved for my work contacts (syncing with my Blackberry). Also, I wanted the convenience of over-the-air syncing of contacts.

What I decided to do was use Google Sync to sync my iPhone with Gmail OTA and make Gmail as my central repository for my contacts. So now, I can keep all my contacts in one place and rest assured that it's always in sync with my phone.

Added bonus is that I can use a proper keyboard and large screen to edit all my contacts and just let it sync with the iPhone later. No more squinting and cursing every time I hit the wrong key on the iPhone's touch screen keypad. =)

If you do intend to do this, please do note that OTA services will require data enabled and chew up data bandwidth in the background, so if you are on a pay-as-you-go data service, you might want to reconsider using OTA and just revert to the good ol' USB cable to sync using iTunes.

Ok, now that we got that disclaimer out of the way, here are the instructions (these instructions will also allow you to sync your calendar with Google Calendar and enable Push mail with Gmail).
  1. Ensure that you are on iPhone OS 3.0 or higher. You can check this by going to Settings -> General -> About -> Version. If you are not on OS 3.0, fire up iTunes and download the latest OS from Apple.
  2. From the home screen, select Settings.
  3. Scroll down and select Mail, Contacts, Calendars.
  4. Select Add Account... .
  5. Select Microsoft Exchange (don't ask me why...).
  6. In the Email field, enter your full Gmail email address (ie. username@gmail.com, not just username).
  7. In the Username field, enter your full Gmail email address again.
  8. In the Password field, enter your Gmail password.
  9. Tap the Next button at the top of the screen.
  10. A new Server field will appear. Enter m.google.com in that field.
  11. Tap the Next button at the top of the screen again.
  12. You can now choose whether to sync your Mail, Contacts and/or Calendars with Google Mail/Calendar.
  13. Ensure that the Contacts service is set to On and tap the Done button at the top of the screen.
  14. You will now be asked what you want to do with the existing contacts that you have on your iPhone. This will determine how your iPhone will sync your contacts with Gmail, so choose carefully!
  15. If you choose Keep on my iPhone, your contacts will be synced according to the All Contacts group in Gmail Contacts.
  16. If you choose to Delete your existing contacts on the iPhone, your contacts will be synched according to the My Contacts group in Gmail Contacts.
  17. I personally prefer to sync with the My Contacts group as Gmail has a tendency to just add anyone and everyone to your All Contacts group and this really messes up the contacts on my phone. The only problem with this is that you need to delete all the existing contacts on your iPhone to do this. Thankfully, I did this earlier on so I didn't have many contacts on the iPhone yet.
That's it! Now, all you need to do is wait for the syncing to complete in the background. You can also kickstart the sync by launching your iPhone Contacts app.